Shared Borders basically are a separate piece of HTML code that is applied to every page. You can edit the shared border just as you would a Web page.
Both shared borders and frames enable you to design Web pages that combine fixed and changing elements. Shared borders and frames both enable you to "frame" Web pages with what are, basically, other Web pages. In this way, you can provide a consistent look to sections of your Web site and anchor your students with elements that provide navigation and structure.
Frames allow two or more Web pages in your Web site to be viewed simultaneously in a viewers browser. For example, many websites that use frames keep one frame as a "navigation" screen and the other as a "content" screen. Each frame, then, actually displays a separate file (e.g., a file called 'nav.htm' in the navigation frame and a file called 'main.htm' in the content frame). Frames are more complex than shared borders, and allow for more design options.
Adding a Shared Border
 |
To
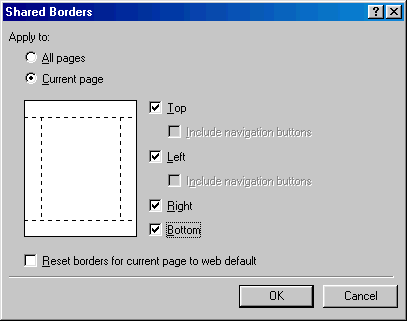
use shared borders, choose Shared
Borders from
the Format
menu, and check the boxes that correspond to the areas of the page where
you would like to use shared borders. Also choose whether you want
them to appear on every page, or just a selected page.
Shared Borders basically are a separate piece of HTML code that is applied to every page. You can edit the shared border just as you would a Web page. |
Adding a Frame document
 |
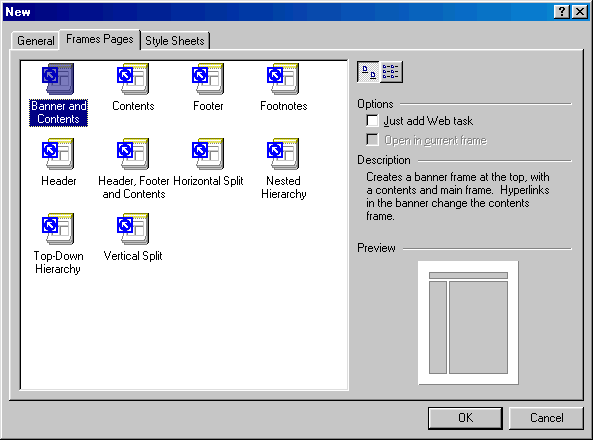
You can add a frames page only when you add a new page. To do this, select New Page from the File menu. Then select the tab for Frames Pages. You will see several choices for Frames layouts. There is also a handy preview of each type. The most common layout is shown above, and has a top frame for title, and a side frame for navigation links. |
 |
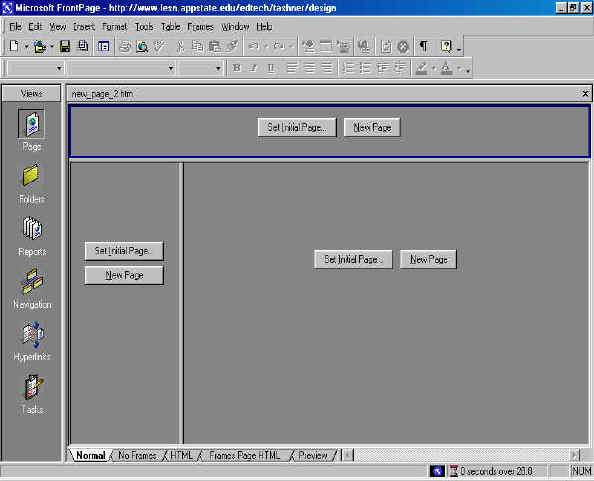
| The above screen is what you will see first. You must set the initial page for each frame, or design a new page if you do not have any pages yet. |