Displaying Results from a Database
Return to Using the FrontPage Database Wizards
| The following instructions assume that you have a database in your web and that you have a "database connection" already established. |
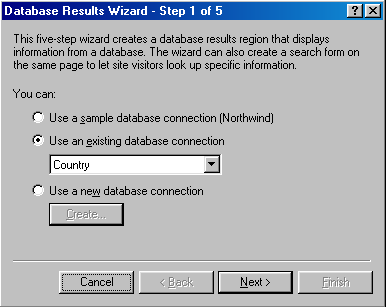
| 1. Go to the Insert menu and select Database Results. That will start the wizard. |

| The dropdown menu under "Use an existing database connection" will list all the databases you have made connections to. Select the database you wish to use and click "Next >". |
| 2. Select the source in the database you wish to use. |
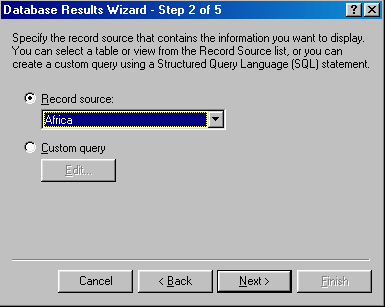
| The dropdown menu under "Record Source:" will list all tables and queries contained in the database you are using. Select the source you wish to use and click "Next >". |
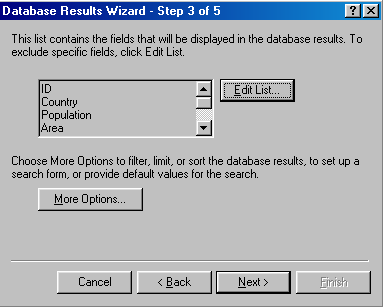
| 3. Step 3 in the Database Results Wizard gives you several options for selecting data to display. The list next to the "Edit List..." button contains all the fields to be found in the database table you have selected to use. You can choose which fields you wish to display by clicking on the "Edit List..." button. |
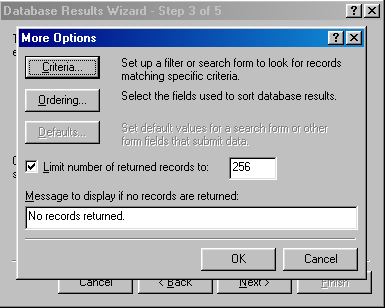
| The "More Options..." button gives you several other options you can use to display your data. Starting at the bottom of the window, you can designate what message to display if the database search ends in no records being selected. Above that there is a place that allows you to set a limit on the number of records to display. And above that there is an option for setting the order of the records displayed (alphabetically or numerically. |
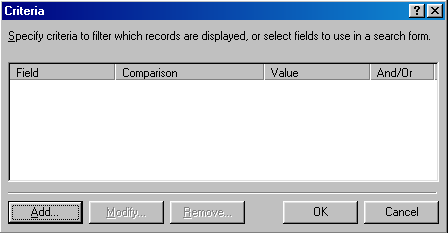
| The "Criteria..." button allows you to set the criteria for the search of the database. If you do not set any criteria the results wizard will display all records in the database. If you click on the "Add..." button you can designate search criteria that will limit the records displayed to those records matching the search criteria. |
| To set criteria you need to tell the wizard what field name you wish to search, how you wish it to match the value you set (this image shows Equals), and the value you want to match. A key component of matching values is the checkbox under the "Value:" field. If this box is checked the wizard is expecting to receive a value from a form field. That is, that you have set up a form field on a web page and are sending whatever is in that field to the page with this wizard on it. In the "Value:" field you can type in the value you want to match. The default value will be the same name as the field name. If you name your form fields that same as your database fields this works very well. If you want to search for a specific value and don't use a search form field you need to uncheck the "Use this search form field" box. |
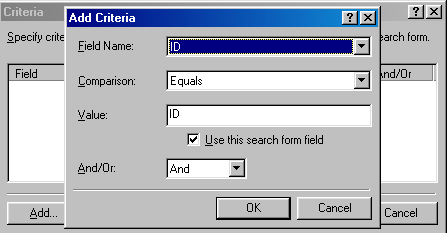
| An example of would be to search the database for all
countries that have a democracy. In that case you would want the field
name to be government, the comparison to be equals, and the value to be
democracy with the "Use this search form field" box unchecked.
You can put criteria together with either AND or OR links. |
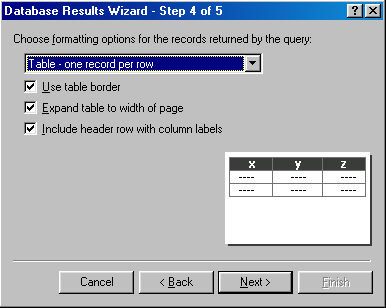
| 4. Choose your display options: table format, list format, etc. Once you complete the wizard it is possible to change some things in the display by working directly with the page that has been produced. |
| 5. You can now choose to display all the records or to split the records displayed into groups. If you choose to display the records in groups the wizard will put buttons on your pages that will allow the user to move through the records. Notice the "Add search form" check box. You can add a search form to the results page if you wish but I usually find it easier to build the search form on a previous page. |
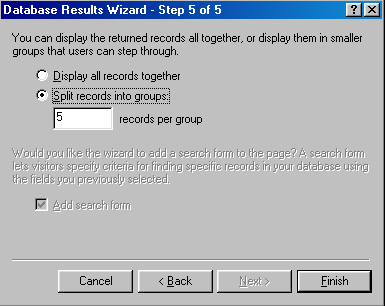
| By clicking on the "Finish" button you will produce a database results region on your page. You must save the page as an ASP page (use the .asp extension). |